
Skip to content
Kenya Barista Organization

live, love, coffee

⌄

From Bean to Cup


1. Planting
Young coffee Plant bean is actually a seed. When dried, roasted and ground, it’s used to brew coffee. If the seed isn’t processed, it can be planted and grow into a coffee tree. Coffee seeds are generally planted in large beds in shaded nurseries. The seedlings will be watered frequently and shaded from bright sunlight until they are hearty enough to be permanently planted. Planting often takes place during the wet season, so that the soil remains moist while the roots become firmly established.
2. Harvesting the Cherries
Coffee cherries on the tree Depending on the variety, it will take approximately 3 to 4 years for the newly planted coffee trees to bear fruit. The fruit, called the coffee cherry, turns a bright, deep red when it is ripe and ready to be harvested. There is typically one major harvest a year. In countries like Colombia, where there are two flowerings annually, there is a main and secondary crop. In most countries, the crop is picked by hand in a labor-intensive and difficult process, though in places like Brazil where the landscape is relatively flat and the coffee fields immense, the process has been mechanized. Whether by hand or by machine, all coffee is harvested in one of two ways: Strip Picked: All of the cherries are stripped off of the branch at one time, either by machine or by hand. Selectively Picked: Only the ripe cherries are harvested, and they are picked individually by hand. Pickers rotate among the trees every eight to 10 days, choosing only the cherries which are at the peak of ripeness. Because this kind of harvest is labor intensive and more costly, it is used primarily to harvest the finer Arabica beans. A good picker averages approximately 100 to 200 pounds of coffee cherries a day, which will produce 20 to 40 pounds of coffee beans. Each worker's daily haul is carefully weighed, and each picker is paid on the merit of his or her work. The day's harvest is then transported to the processing plant.
3. Processing the Cherries
processing cherriesOnce the coffee has been picked, processing must begin as quickly as possible to prevent fruit spoilage. Depending on location and local resources, coffee is processed in one of two ways: The Dry Method is the age-old method of processing coffee, and still used in many countries where water resources are limited. The freshly picked cherries are simply spread out on huge surfaces to dry in the sun. In order to prevent the cherries from spoiling, they are raked and turned throughout the day, then covered at night or during rain to prevent them from getting wet. Depending on the weather, this process might continue for several weeks for each batch of coffee until the moisture content of the cherries drops to 11%. The Wet Method removes the pulp from the coffee cherry after harvesting so the bean is dried with only the parchment skin left on. First, the freshly harvested cherries are passed through a pulping machine to separate the skin and pulp from the bean. Then the beans are separated by weight as they pass through water channels. The lighter beans float to the top, while the heavier ripe beans sink to the bottom. They are passed through a series of rotating drums which separate them by size. After separation, the beans are transported to large, water-filled fermentation tanks. Depending on a combination of factors -- such as the condition of the beans, the climate and the altitude -- they will remain in these tanks for anywhere from 12 to 48 hours to remove the slick layer of mucilage (called the parenchyma) that is still attached to the parchment. While resting in the tanks, naturally occurring enzymes will cause this layer to dissolve. When fermentation is complete, the beans feel rough to the touch. The beans are rinsed by going through additional water channels, and are ready for drying.
4. Drying the Beans
Coffee cherries on the treeIf the beans have been processed by the wet method, the pulped and fermented beans must now be dried to approximately 11% moisture to properly prepare them for storage. These beans, still inside the parchment envelope (the endocarp), can be sun-dried by spreading them on drying tables or floors, where they are turned regularly, or they can be machine-dried in large tumblers. The dried beans are known as parchment coffee, and are warehoused in jute or sisal bags until they are readied for export.
5. Milling the Beans
Processing coffee beans Before being exported, parchment coffee is processed in the following manner: Hulling machinery removes the parchment layer (endocarp) from wet processed coffee. Hulling dry processed coffee refers to removing the entire dried husk — the exocarp, mesocarp and endocarp — of the dried cherries. Polishing is an optional process where any silver skin that remains on the beans after hulling is removed by machine. While polished beans are considered superior to unpolished ones, in reality, there is little difference between the two. Grading and Sorting is done by size and weight, and beans are also reviewed for color flaws or other imperfections. Beans are sized by being passed through a series of screens. They are also sorted pneumatically by using an air jet to separate heavy from light beans. Typically, the bean size is represented on a scale of 10 to 20. The number represents the size of a round hole's diameter in terms of 1/64's of an inch. A number 10 bean would be the approximate size of a hole in a diameter of 10/64 of an inch, and a number 15 bean, 15/64 of an inch. Finally, defective beans are removed either by hand or by machinery. Beans that are unsatisfactory due to deficiencies (unacceptable size or color, over-fermented beans, insect-damaged, unhulled) are removed. In many countries, this process is done both by machine and by hand, ensuring that only the finest quality coffee beans are exported.
6. Exporting the Beans
exporting beansThe milled beans, now referred to as green coffee, are loaded onto ships in either jute or sisal bags loaded in shipping containers, or bulk-shipped inside plastic-lined containers. World coffee production is forecast to be 152.7 million 60-kg bags,
7. Tasting the Coffee
Cupping coffee at originCoffee is repeatedly tested for quality and taste. This process is referred to as cupping and usually takes place in a room specifically designed to facilitate the process. *First, the taster — usually called the cupper — evaluates the beans for their overall visual quality. The beans are then roasted in a small laboratory roaster, immediately ground and infused in boiling water with carefully-controlled temperature. The cupper noses the brew to experience its aroma, an essential step in judging the coffee's quality. After letting the coffee rest for several minutes, the cupper breaks the crust by pushing aside the grounds at the top of the cup. Again, the coffee is nosed before the tasting begins.To taste the coffee, the cupper slurps a spoonful with a quick inhalation. The objective is to spray the coffee evenly over the cupper's taste buds, and then weigh it on the tongue before spitting it out. Samples from a variety of batches and different beans are tasted daily. Coffees are not only analyzed to determine their characteristics and flaws, but also for the purpose of blending different beans or creating the proper roast. An expert cupper can taste hundreds of samples of coffee a day and still taste the subtle differences between them.
8. Roasting the Coffee
Batch coffee roastingRoasting transforms green coffee into the aromatic brown beans that we purchase in our favorite stores or cafés. Most roasting machines maintain a temperature of about 550 degrees Fahrenheit. The beans are kept moving throughout the entire process to keep them from burning. When they reach an internal temperature of about 400 degrees Fahrenheit, they begin to turn brown and the caffeol, a fragrant oil locked inside the beans, begins to emerge. This process called pyrolysis is at the heart of roasting — it produces the flavor and aroma of the coffee we drink. After roasting, the beans are immediately cooled either by air or water. Roasting is generally performed in the importing countries because freshly roasted beans must reach the consumer as quickly as possible.
9. Grinding Coffee
coffee groundsThe objective of a proper grind is to get the most flavor in a cup of coffee. How coarse or fine the coffee is ground depends on the brewing method. The length of time the grounds will be in contact with water determines the ideal grade of grind Generally, the finer the grind, the more quickly the coffee should be prepared. That’s why coffee ground for an espresso machine is much finer than coffee brewed in a drip system.
10. Brewing Coffee
To master how to brew coffee, use our guide for tips and methods on how to make the perfect cup for any preference. Enjoy

Coffee Brewing Methods

Liquid energy, and brew are just some of the terms used to describe one of the world’s most highly consumed beverages - coffee. One of the most important factors that affect the taste of coffee is the way in which you brew it. Understanding these coffee brewing methods helps to build the foundation for some of the most popular coffee drinks offered in cafes and coffee bars, and will greatly improve your staff’s knowledge and success!

Ways to Brew Coffee

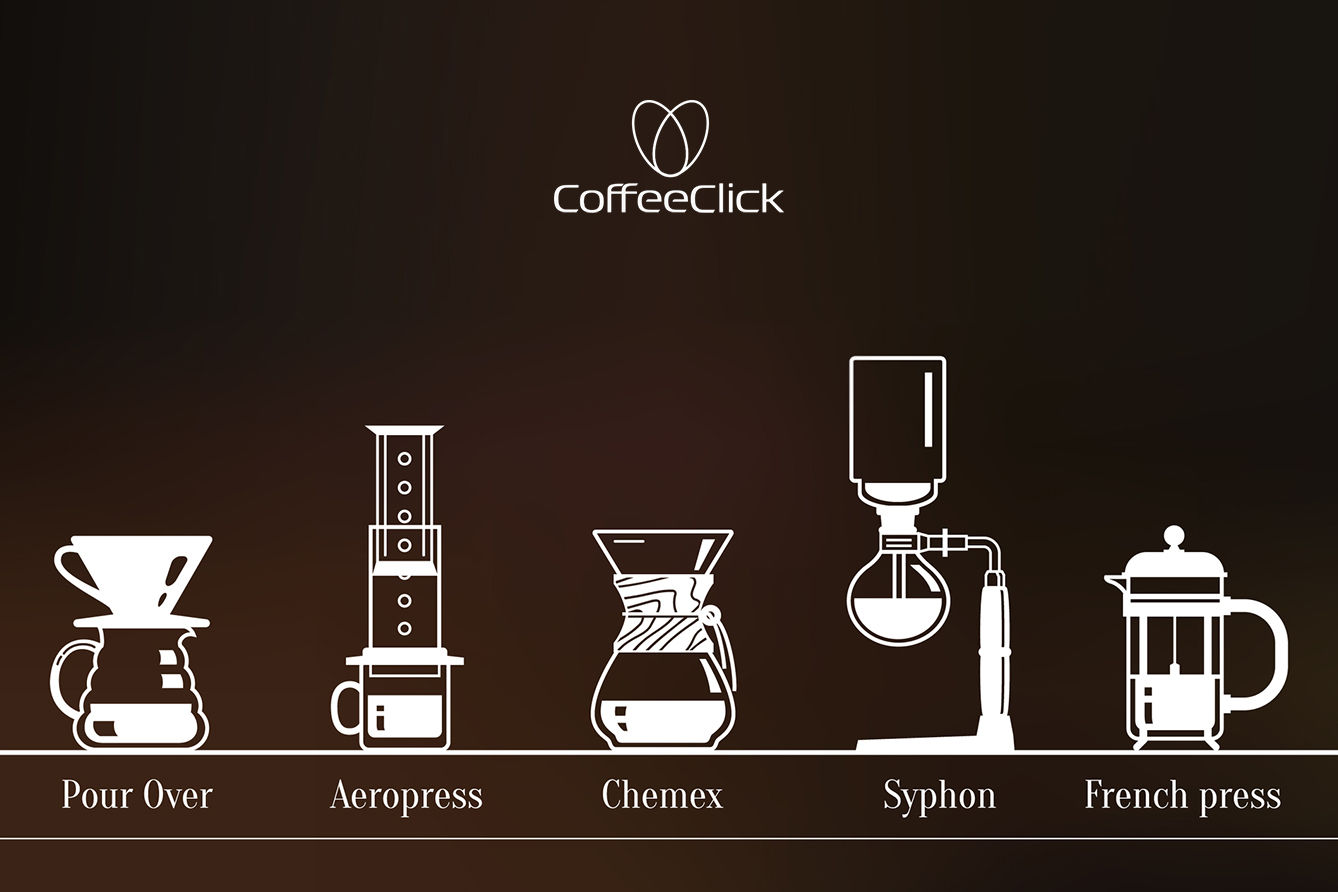
Once coffee beans have been harvested and roasted, it’s time to convert them into a liquid. The most popular methods of doing this include using a drip coffee maker, French press, or espresso machine. Understanding these three processes is essential when running a successful café since each variation produces a different flavor, brew time, and caffeine level for your customers’ favorite drinks.
Coffee guide illustration

What You'll need:

  • Chemex carafe
  • Chemex filters
  • Kettle
  • Grinder
  • Digital Scale
  • Timer
  • Brew Time
  • 3 - 4 Minutes

Background

Equal parts brilliance and common sense, the Chemex remains a staple in every coffee enthusiast's arsenal. Its design has endured, unchanged (wood handle, leather cord, tapered glass and all), since its invention in 1941 by Peter Schlumbohm. Schlumbohm’s designs were characterized as “a synthesis of logic and madness,” and we're inclined to agree. Coffee from a Chemex is very similar to that from a drip, but there’s more room for error. To guarantee the best results, grind your beans more coarsely than you would for a ceramic drip, and offer extra attention to the pour rate. This level of care yields a delicate and nuanced coffee, with plenty left over to share with friends.

step 1
Note: The amount of coffee and water varies depending on the type of coffee you are brewing and your preferred strength. As a starting point, we recommend using 50 grams of coffee and 700 grams of water (about 25 ounces), and then adjust according to your taste. Weigh out the coffee and grind to a coarseness resembling sea salt.
step 2
Unfold your filter and place it in your Chemex, ensuring that the triple-fold portion is facing the pour spout and lays across without obstructing it.
step 3
Fully saturate the filter and warm the vessel with hot water. Discard this water through the pour spout.
step 4
Pour your ground coffee into the filter and give it a gentle shake. This will flatten the bed, allowing for a more-even pour.
step 5
There will be four pours total, and this is the first. Starting at the bed’s center, gently pour twice the amount of water that you have coffee into your grounds (for example, 50 grams of water if you have 25 grams of coffee). Work your way gently outward, and avoid pouring down the sides of the filter. You’ll notice that adding this amount of water causes the coffee to expand, or “bloom.” Allow it to do so for 45–55 seconds. A solid bloom ensures even saturation.
step 6
Pour water in a circular pattern starting in the center. Spiral out toward the edge of the slurry before spiraling back toward the middle. Avoid pouring on the filter. Allow the water to drip through the grounds until the slurry drops 1 inch from the bottom of the filter. You should use about 200 grams of water for this pour.
step 7
Repeat the same pour pattern as in Step 6, adding water in 200-gram increments. Repeat once more, allowing the water to percolate through the grounds until the slurry drops 1 inch from the bottom of the filter before beginning the next pour. Allow the water to drip through the grounds entirely.
step 8
The brew should have taken between 3.5–4.5 minutes. If the brew was too fast, consider using a finer grind or a slower pour rate next time. If the brew was too slow, consider using a coarser grind or a faster pour rate.

What You'll need:

  • Blue Bottle Coffee Dripper
  • Blue Bottle Coffee filters
  • Kettle
  • Grinder
  • Digital Scale
  • Timer
  • Brew Time
  • 2½ - 3 Minutes

Background

The ritual of the pour over is like a meditation: There’s no machine in your way, no flashing green lights, no electric power cords. Just you and a few simple tools. The final cup is reminiscent of one from a drip coffeemaker, but noticeably more delicate and complex. Observe the bloom, experience the first trace of coffee-drunk steam, notice how the spiral of the pour alters the final cup. This simple experience gets you in tune with your coffee.

step 1
Bring at least 600 grams (20 oz) of water to a boil.
step 2
Grind 30 grams of coffee (3 tbsp) to a coarseness resembling sea salt. To enjoy the nuanced flavor of a single-origin coffee that is lightly roasted, we recommend less coffee: 23 grams for every 350 grams water
step 3
Place a filter in the dripper. If you are using a custom Blue Bottle filter, there is no need to pre-wet it. If you are using a #2 filter with another dripper, we recommend wetting the filter with hot water and then dumping the water before proceeding with brewing.
step 4
Add the ground coffee to the filter and gently tap it to level the surface of the grounds. Place the brewer on a carafe or cup, place this entire set-up onto a digital scale, and set it to zero.
step 5
There will be four pours total for this coffee preparation. This is the first, and the most magical, because it is when you will see the coffee “bloom.” As hot water first hits the grounds, Co2 is released creating a blossoming effect—the grounds will rise up en masse. Start a timer. Begin pouring water slowly over the coffee, starting at the outer rim and moving in a steady spiral toward the center of the grounds. Stop pouring when the scale reaches 60 grams. Make sure all the grounds are saturated, even if you need to add a little water. The pour should take about 15 seconds. Give the coffee an additional 30 seconds to drip before moving on to the second pour.
step 6
Starting in the center of the grounds, pour in a steady spiral toward the outer edge and then back toward the center. Be sure to pour all the way out to the edge over the ripples in the filter. This helps to keep grounds from being trapped in there and removed from the rest of the extraction. Add roughly 90 grams, bringing the total to 150 grams. The goal during this pour is to sink all of the grounds on the surface of the bed. This creates a gentle turbulence that “stirs” the coffee, allowing water to more evenly extract the grounds. Allow 45–65 seconds to elapse.
step 7
As the mixture of water and coffee from the second pour drops to the bottom of the filter, coming close to the level of the grounds, pour an additional 100 grams of water using the same pattern as the second pour. This brings the total up to 250 grams and should take 15–20 seconds.
step 8
When the water and coffee from the third pour drops to the bottom of the filter, complete your fourth and final pour. Add 100 grams, bringing the total up to 350 grams of water. This pour should take 20 second

What You'll need:

  • Grinder
  • Coffee
  • Scale
  • Siphon Set
  • Thermometer
  • Timer
  • Brew Time
  • 2 - 2½ Minutes

Background

Siphon coffee was invented in the 1840s more or less simultaneously by a French housewife and Scottish marine engineer. It’s been refined many times, but a few principles hold true: It produces a delicate, tea-like cup of coffee; it can be quite persnickety; and it is, for our money, one of the coolest brew methods available.

step 1
After soaking your filter in a warm water bath for at least five minutes, drop it into the bottom of your siphon’s top component, or “hopper,” and hook to the bottom of the hopper’s glass tubing.
step 2
Fill your siphon’s bottom component, or “bulb,” with 300 grams of hot water (about a 12-oz. cup’s worth).
step 3
Insert the hopper, filter and all, into the bulb. You don't have to press too hard; just make sure it's securely and evenly in place. Position the entire assembly above your heat source
step 4
While the water is heating, measure out between 20-25 grams of coffee and grind it just little bit finer than you would for regular drip coffee.
step 5
Soon, the water in the bulb will begin boiling and rise up into the hopper. For some physics-related reason we don’t fully understand, a little bit will stay in the bottom. Don’t worry about this little bit
step 6
Once the water has moved into the hopper, turn your heat source down so that the water is between 185-195 degrees F.
step 7
Add your coffee, and gently (but thoroughly) submerge it with a bamboo paddle or butter knife
step 8
Let the coffee brew, undisturbed, for one minute and 10 seconds.
step 9
In one brisk motion, remove your siphon from its heat source and give it ten stirs with a bamboo paddle.
step 10
Your coffee should take another minute or so to draw downward and finally rest in the bulb. You'll know it's ready when a dome of grounds has formed at the top of the filter, and when the coffee at the bottom has begun to bubble at approximately the pace and strength of a kitten’s heartbeat. Remove the hopper and serve. In order to guarantee the most complex cup, give the coffee a few minutes to cool.

What You'll need:

  • Grinder
  • Coffee
  • Scale
  • Moka Pot (Pictured: "Bialetti Jr.")
  • Kettle
  • Timer

Background

A tiny, Italian-made, eight-sided wonder, the Moka pot has been with us through our fair share of postage-stamp-sized kitchens and far-flung journeys. It’s experiencing a resurgence lately, which is no doubt due to its ability to produce a viscous, appropriately dense espresso with no electricity or fancy equipment. We’re also charmed by the little gurgle it makes as it works its magic on the stovetop.

step 1
Grind about 20-22 grams of coffee, about as finely as you would for a shot of espresso.
step 2
Boil water, and fill the bottom half of your Moka pot with water that’s fresh off the boil.
step 3
Fill the pot’s filter basket with the ground coffee, and give it a shake to settle the grounds evenly. Now place it into the bottom compartment.
step 4
Screw on the Moka pot’s spouted top. Caution! The bottom chamber will be hot.
step 5
Place the pot on a stove set to medium heat.
step 6
When the water in the bottom chamber approaches a boil, the pressure will push a stream of coffee slowly and methodically through the upper chamber. If it explodes upward, your water’s too hot, if it burbles lethargically, turn up your flame. You know it’s done when you hear a hissing, bubbling sound

What You'll need:

  • Bamboo Paddle or Butter Knife
  • Grinder
  • Coffee
  • Scale
  • Filtron Set
  • Stainless Steel Bowl
  • Brew Time
  • 12 hours

Background

Like surprise parties and camping trips, cold brew is a planner’s dream. With a bit of foresight and some basic instructions, the Filtron method is the most reliable and delicious way to achieve a single origin iced coffee at home. Set your stopwatch for a 12-hour countdown and you’ll be generously rewarded—a crystalline, concentrated brew, with plenty of zing, is your prize.

step 1
Measure out 2,000 grams (two liters) of water.
step 2
Place the Filtron’s rubber cap in the hole at the bottom of the device.
step 3
Wet the wool filter and place it in the circular groove at the bottom of the Filtron. You’ll want to make sure this is in evenly; otherwise, the extraction may be subpar.
step 4
Unfold your filter and place it in the Filtron. It will be a slightly loose fit. Secure it evenly and fold where necessary.
step 5
Weigh out one pound (454 grams) of coffee.
step 6
Grind the coffee finely into a large nonreactive bowl.
step 7
Add your coffee to the Filtron, then give it a few shakes to level the bed.
step 8
Pour your water over the grounds—gradually and carefully—in a series of concentric circles.
step 9
Submerge the grounds with a butter knife or bamboo paddle.
step 10
Place the plastic disc filter on top of the filter, then place the plastic top component on top of that. Let steep for 12 hours.
step 11
Here’s where you’ll need a friend. Carefully position the Filtron over your carafe and swiftly pull out the rubber stopper. Often, you have a couple of seconds before the flow of coffee begins.

What You'll need:

  • French Press
  • Grinder
  • Coffee
  • Scale
  • Kettle
  • Wooden Spoon
  • Brew Time
  • 4 minutes

Background

French press coffee is dense and heavy, yet it has its own sort of elegance. As with any method, the devil is in the details: To achieve a full expression of the coffee, decant it immediately after brewing so it doesn’t become bitter or chalky. Then, sink into this rich and heady cup. It only takes four minutes to brew.

step 1
Bring enough water to fill the French press to a boil. For a 17-oz press, you'll need about 350 grams (12 ounces).
step 2
While the water is heating, grind your coffee. French press coffee calls for a coarse, even grind. We recommend starting with a 1:12 coffee-to-water ratio. If you're using 350 grams of water, you’ll want 30 grams of coffee.
step 3
To start, gently pour twice the amount of water than you have coffee onto your grounds. For example, if you have 30 grams of coffee, you’ll want to start with 60 grams of water.
step 4
Give the grounds a gentle stir with a bamboo paddle or chopstick. Allow the coffee to bloom for 30 seconds.
step 5
Pour the remaining water and place the lid gently on top of the grounds. Don’t plunge just yet. Let the coffee steep for four minutes. Four. Don’t guess.
step 6
Gently remove your French press from the scale and place it on your counter. Press the filter down. If it’s hard to press, that means your grind is too fine; if the plunger “thunks” immediately down to the floor, it means your grind is too coarse. The sweet spot, pressure-wise, is 15–20 pounds. Not sure what this feels like? Try it out on your bathroom scale. When you’ve finished pressing, serve the coffee immediately. Don’t let it sit, as this will cause it to continue brewing and over-extract.

Cold Drip & Cold Brew

It draws out less oils and acids from the bean than a hot process would, the cold extraction method allows for a lighter and more floral drink and minimizes bitterness. The slower process means the caffeine content is higher, too

Cold brew is generally a lot lighter, compared to cold drip, which is more intense and concentrated

The main difference between the two is the method. Cold brew uses an immersion technique, mixing coffee and water, which is left to ‘brew’. “ a process where coffee grounds are steeped in temperature-controlled [cold] water for an extended period, until desired extraction is achieved,”

Cold drip coffee requires timed contact with water and coffee, controlled by a slow drip and grind size. This is achieved with a drip tower, usually made up of three glass vessels held together by a wooden stand. “With the drip, you’re getting a drop of water that [flows through coffee grounds and] collects aromatic compounds, fats and lipids which then gets stored in a separate vessel. As opposed to [cold brew’s] immersion style where everything is swelling together and it’s almost like a stew, (There’s plenty of room for variation, too)

You can set up a cold dripper with a coarser grind and faster drip to achieve something a bit lighter and fresher, as opposed to the intensity of something slower.”

Adding milk to cold brew will mask its subtle flavors. The upside is, cold brew’s lighter style allows the floral aromas of the coffee bean to shine through, which makes for an enjoyable and almost bitter-less black drink.

Is Cold Brew Stronger than regular Coffee?

It’s hard to give a straight answer to this. In terms of the coffee you produce, yes, it will have a higher caffeine content, but as cold brew is generally treated as a concentrate and served diluted (like a cold brew espresso), it would depend entirely on how much additional water you add to your cup.

Why Does Cold Brew Coffee Taste Better?

Cold water extracts less fatty oils and acids from the coffee, which in turn means the taste is less acidic and bitter than a hot coffee. It is estimated this create a brew with around a third of the amount of acid found in a hot coffee. This allows the sweeter and more floral notes present to come to the fore as they are no longer suppressed by the acidic, bitter and sour tones which extract during hot coffee making, resulting in a much sweeter cup of coffee. This difference in extraction, however, may need to be factored in when choosing the best cold brew coffee beans.

Why Is Cold Brew Coffee Better For You?

I’m sure as hardened coffee drinkers we’ve all experienced that one cup too many which can make your stomach flip, and the reason that happens is acid. Additional acid is the stomach’s enemy, as it already has quite enough of it. So, for the reasons we’ve just stated above, the lack of acid means cold brew is better for your digestive health and so in the short to long term will benefit your overall wellbeing.

Cold Drip Coffee

Cold coffee drip beside a plant pot Cold drip coffee uses a system of three beakers (normally)

The first beaker contains water which is drip controlled to very slowly release water into the coffee grounds. Once the grounds are saturated, they will then start to slowly drip the coffee into the final beaker, creating a darker, more intense cold coffee.

How Long Could Drip Coffee Take?

Depending on the size of the machine, a full batch of cold drip can take anywhere from 3 to 24 hours. Shorter brews generally will produce a less intense cup as the extraction time is shorter, which may well be to your taste, but there are a number of variables, as with all brew methods, which will affect this, such as the size of the grains used and the temperature of the water. Generally, though cold drip can be produced faster than cold brew coffee.

Cold drip coffee is a more scientific process and visually more exciting. Water is dripped very slowly from the top beaker into the coffee grains, which then absorb this slowly until they can take on no more, at which point coffee begins to drip through a filter into the beaker below. This produces a pre-filtered coffee which is more intense than cold brewed coffee

Cold brew coffee may well work out the stronger of the two in its ‘raw’ form, but as it is treated as a concentrate and used as the base for many iced coffees, much like the espresso is for hot brews, when served it will be diluted and so work out weaker by volume. Cold drip coffee is generally served straight over ice with no additional water, and so although you’ll be drinking a smaller cup, the ration of caffeine to water will be higher.


Taste & Flavor


Both brews will taste noticeably less acidic and bitter than brewing espresso, drip or other hot brewing methods. Cold brew coffee should be the lighter of the two, refreshing and with easily discernable sweet and floral notes. It works best as a base for iced coffees and will generally be diluted. It will almost always be served black. Cold drip coffee, although still way less acidic than hot coffees, will taste a little more full-bodied and richer, but will still be delightfully sweet and floral. Cold drip coffee tends to lose a lot of complexity when diluted so will normally be best served straight over ice. If you prefer milk in your coffee of the two this will stand up the best, as the stronger flavors will still carry through the milk, whereas cold brew may lose the more subtle flavors which complete its taste.

Any coffee lover would agree that the method you use to brew your beans does make all the difference in the aroma, texture, freshness, and taste you end up with in your cup.

The coffee brewing method you use can also determine the nutritional value and the amount of antioxidants in your java, and may even help reduce your exposure to the carcinogenic chemicals that occur with certain coffee brewing techniques.

coffee filters contain chemicals, called dioxins and epichlorohydrin, which become carcinogenic when they come in contact with water

Chlorogenic acids are the reason why coffee is said to have protective effects against Alzheimer’s, Parkinson’s, and dementia

Standard white paper coffee filters are bleached with chlorine, and contain carcinogenic chemicals such as epichlorohydrin and dioxins. (5, 6) Dioxins are a byproduct of paper bleaching, and can accumulate in tissues and disrupt hormones. (7, 8)

While it’s unclear exactly how much of these chemicals can wind up in your cup, it’s safer to stick to unbleached paper coffee filters, or better yet, switch to reusable hemp coffee filters which are better for you and the environment.

Chemex filters are designed to remove sediment, oils and fatty acids, which is also said to make the coffee flavor richer and eliminates the undesirable parts of the coffee bean.
Coffee guide illustration

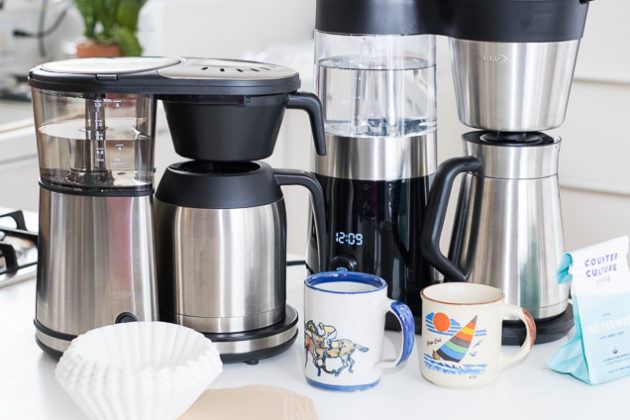
Drip Coffee Maker

Coffee that comes from a drip coffee maker is brewed through a filter containing the ground, coarse coffee beans as boiling water is “dripped” on top. The filter leaves behind the ground coffee beans as liquid passes through and into a decanter or coffee pot that is then used for serving. Making drip coffee takes more time compared to using an espresso machine since hot water is in contact with the ground coffee beans for a longer period. When comparing drip coffee to pressed, drip coffee vs. French press can produce coffee in a faster amount of time since water doesn't need to be steeped.

How to Use a Drip Coffee Maker:

- Place a new coffee filter in the drip coffee maker.

- Add ground coffee beans to the filter in a ratio of 2 tablespoons to every cup of water.

- Add filtered water to the reservoir container.

- Program the machine to brew at a certain time, or press the brew button to start working immediately

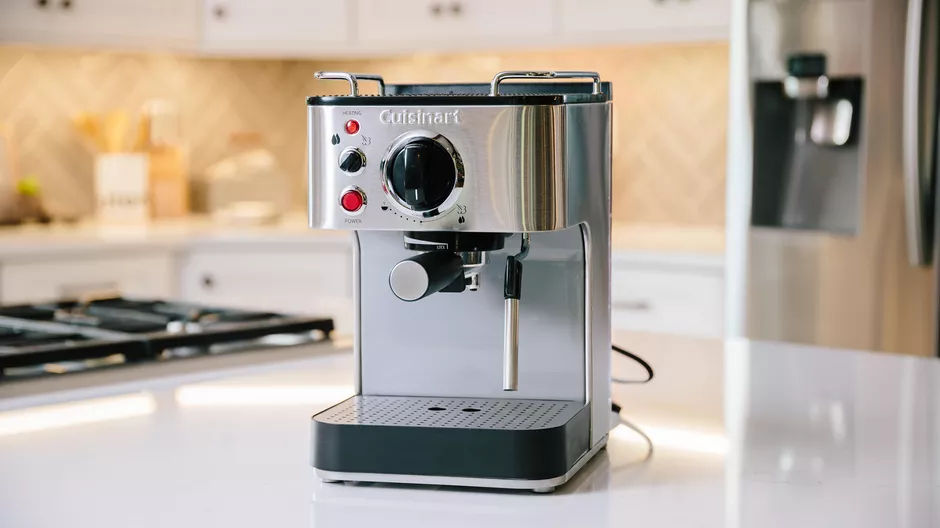
Espresso Machine

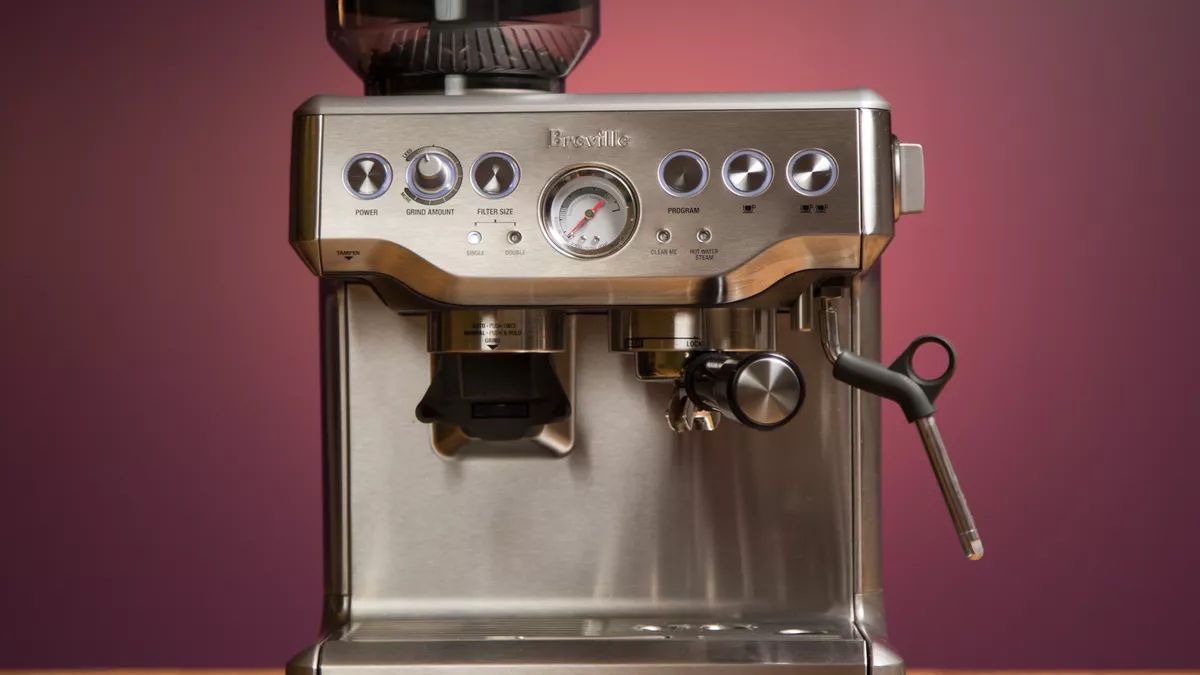
Besides the method of brewing, another difference between dripped, French pressed coffee, and espresso is the texture and size of the types of coffee grounds used. Espresso beans are ground much finer than drip and French pressed coffee, and resemble the consistency of powdered sugar, which are then brewed using an espresso machine. The ground coffee beans are placed into a portafilter, which is the handled part of an espresso machine that attaches to the machine’s gasket. Next, the brewing process begins when water is pressurized through the beans to produce a liquid.

Espresso machines are designed to force a small amount of hot water through the coffee grounds at a very fast speed, and a single shot of espresso can take as little as 20 seconds to brew. Espresso is stronger in taste than the other two brewing methods, and is also creamier due to the creamy froth called crema that is produced.

How to use an Espresso machine:

- Grind coffee beans to a consistency of powdered sugar.

- Pour filtered water into the espresso machine’s water chamber. Use 1 oz. of water for every shot of espresso desired.

- Add espresso grounds to the portafilter.

- Use a tamping tool to pack the grounds into the portafilter.

- Place an espresso cup underneath the espresso machine’s spout to catch the liquid.

- Place the portafilter into its holder and lock into position.

- Press the “start” button and espresso will be extracted in 20-25(single) 25-35 seconds.(double)
Coffee guide illustration Coffee guide illustration